
This past week for my blog post for this week I have been working on my learning project and I can tell you it was a bit challenging as the first side took me a few days to finish which I had a lot of trouble figuring out how to make my brick stitch earrings a little bigger. The second side of my earring went a lot faster as I had my other side to use as a demonstration instead of using my brick stitch grid paper to see which beads go where. A few things that made my beading more challenging and time consuming is when you poke yourself, thread gets a knot or when it takes 5 minutes to thread a needle and I can tell you its annoying (laughing). You really have to have a lot of patients doing this kind of projects also I find it calming and a stress reliever. However, this is a learning curve for me as I am still learning how to make earrings. In the end I gifted my finished earrings to my younger sister and she loved them. I will walk you through a few steps in my process of starting an earring.

This is the starting where you grab three beads depending on your colors and your design and put them in the middle of your thread and then grab another bead, in this step you skip one bead and put it through you middle bead which will make a triangle.
After making your triangle you start adding beads one at a time and your going through each beads up and down till your staring point looks like the picture on the right. So after that you can start working your way up to finish half the side.

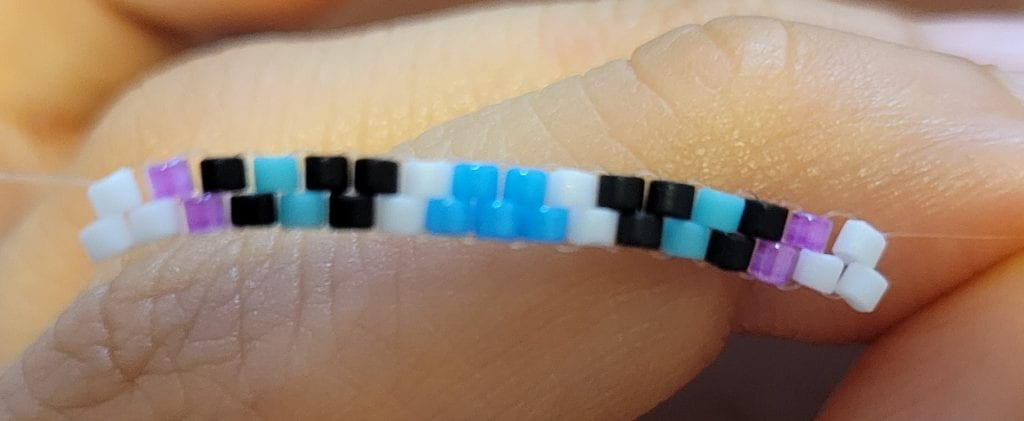
This is what half of the earring will look like when you are working on part of the earring. This has been a challenge for me however, it was fun making these earrings. As I mentioned earlier threading a needle takes long, well for me it does because its so tiny (giggle). To finish this side in order to get the beads to stay in place is to go through the thread and and then threw the bead again which will hold the bead in place.

Finishing off this side was a lot easier and faster knowing I had an example to go off of and using the brick stitch grid paper was too confusing and complicated as I kept making mistakes.
Here is one of my pair of brick stitch earrings that I completed for my learning project and I gifted them to my sister.
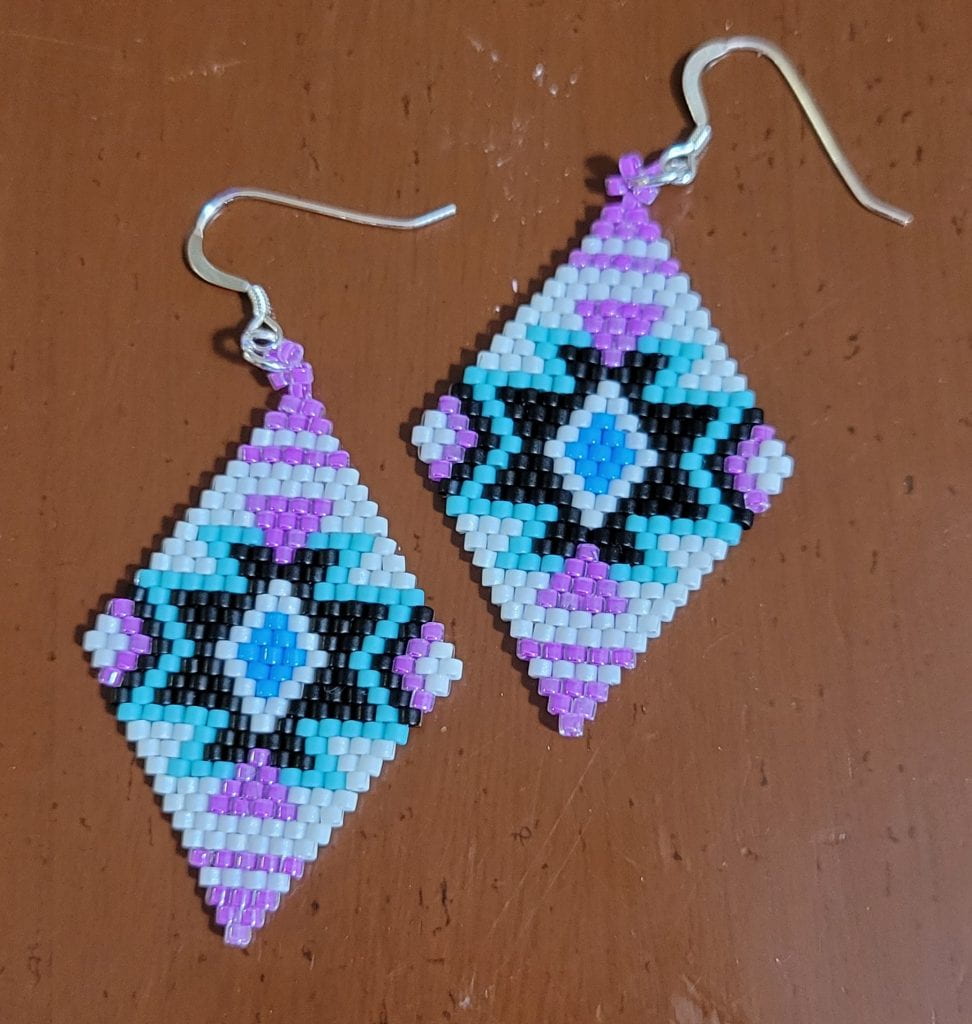
Wow, Rosalie! These earrings are so beautiful! I am impressed! Thank you for sharing. I can see how hard you are working.
Your final product looks outstanding! I cannot believe the amazing work you can do with such tiny beads; my shaky hands would struggle with anything that intricate! 😉
I appreciate you walking us through the process a bit, with the pictures for various checkpoints, because I didn’t have any idea how beaded earrings were made before now.
I’m excited to see what else you’ll make!